


![BaseAire 888 Pro 7,000 mg/h Ozone Generator, Digital O3 Machine Home Ozone Machine Deodorizer - Ozone Generator from [store] by Baseaire - Disinfection, Ozone Generator](http://www.baseaire.com/cdn/shop/products/888-Pro-_-1.jpg?v=1698817267&width=104)


Attic dehumidification is vital to maintaining a healthy and energy-efficient home. By controlling the humidity in attic, you can prevent problems such as mold growth, structural damage, and poor indoor air quality. This guide will explore the sources of attic moisture, its associated risks, and effective strategies for dehumidification.
Key Points to Note
- Regular Checks: Conduct regular inspections to identify moisture issues early.
- Ventilation and Sealing: Improve ventilation and seal leaks to prevent moisture ingress.
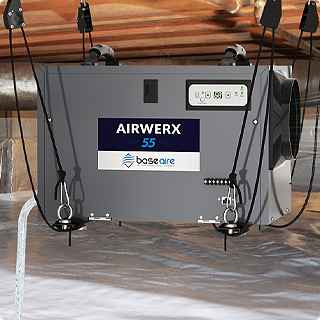
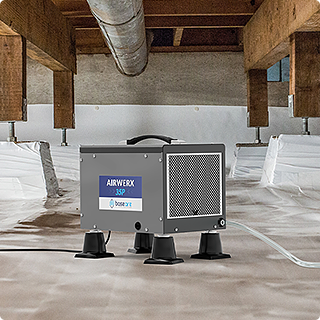
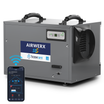
- Use Attic Dehumidifiers: Install an attic dehumidifier, such as the BaseAire AirWerx 55S Smart Dehumidifier Wifi, to maintain optimal humidity levels.
- Preventive Measures: Implement preventive measures to avoid future problems.
Consider investing in a high-quality attic dehumidifier for optimal dehumidification. By staying proactive, you can enjoy the benefits of a dry, energy-efficient, and healthy home.
Where Does Attic Moisture Come From?

Moisture in the attic can come from several sources. Common culprits include roof leaks, poor ventilation, and condensation. Additionally, household activities like cooking, showering, and laundry can introduce excess moisture that migrates upward into the attic. Identifying these sources is essential to address the root cause of the problem.
Moisture Problem in Attic
Excess moisture in the attic can lead to significant damage over time. Mold and mildew thrive in damp environments, posing health risks to occupants. Wooden structures can rot, compromising the structural integrity of your home. Furthermore, high humidity levels can reduce the effectiveness of insulation, leading to higher energy bills.
How to Detect Attic Moisture
Detecting moisture in the attic early can save you from costly repairs. Look for signs such as water stains on the ceiling, damp insulation, a musty odor, or visible mold growth. Condensation on windows or pipes in the attic is another indicator of high humidity levels.
Regular inspections of your attic are crucial for maintaining a dry environment. Scheduling routine checks can help you spot potential issues before they escalate. Use a moisture meter to measure humidity levels and identify problem areas.
Why Should You Dehumidify Your Attic?
Dehumidifying your attic can lead to significant energy savings. By maintaining optimal moisture levels, insulation works more efficiently, reducing the need for heating and cooling. This translates to lower energy bills and a reduced carbon footprint.
Attic Dehumidification Process: How to Dehumidify Attic
Dehumidifying your attic is crucial for preventing moisture-related issues and maintaining a healthy home environment. Follow these steps to effectively dehumidify your attic:
1. Assess the Current State of Your Attic
Begin by conducting a thorough inspection of your attic. Look for signs of moisture, such as water stains, damp insulation, mold growth, or condensation on windows and pipes. Utilize a moisture meter to measure the humidity levels.
2. Improve Ventilation
Enhance the airflow in your attic by installing vents or fans. Ventilation helps to expel moist air and introduce fresh, dry air. Ensure that soffit, ridge, or gable vents are unobstructed and in good working condition.
3. Seal Leaks
Identify and seal any leaks in your attic. Look for cracks, gaps, or other potential entry points for water and moisture. Use appropriate materials such as caulk, sealant, or weatherstripping to close these gaps effectively.
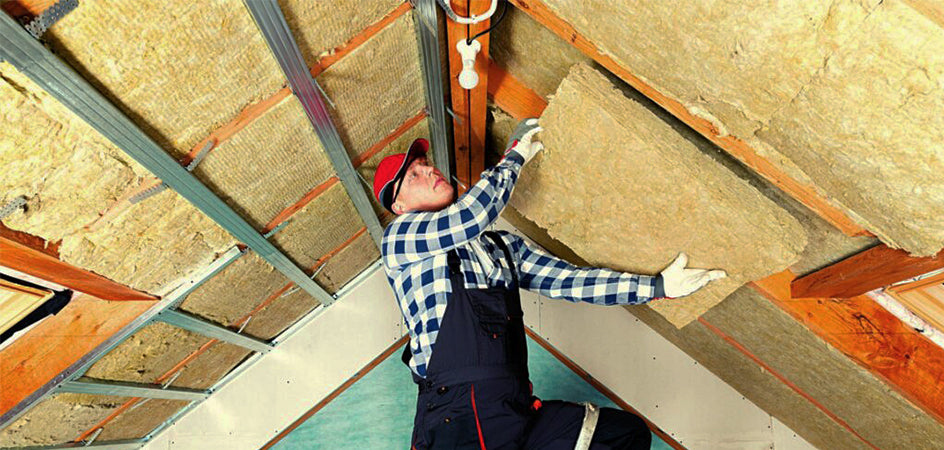
4. Insulate Properly
Ensure that your attic is adequately insulated. Proper insulation helps maintain a consistent temperature, reducing condensation's likelihood. Consider the installation of vapor barriers to prevent moisture from penetrating the insulation.
5. Install an Attic Dehumidifier

Choose a dehumidifier designed for attic use that can cover the entire space. Position the dehumidifier in an area with good airflow, and set up proper drainage to automatically remove collected water. Adjust the settings to maintain optimal humidity levels (typically between 30-50%).
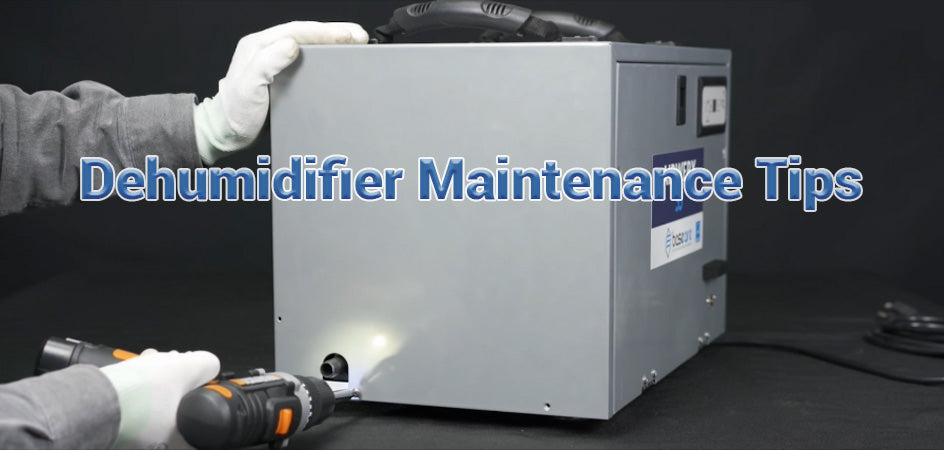
6. Regular Maintenance and Monitoring
Regularly check your attic and dehumidifier to ensure everything is functioning correctly. Use a hygrometer to monitor humidity levels, and adjust your dehumidification efforts as necessary. Periodically clean and maintain the dehumidifier to ensure its efficiency and longevity.
By following these steps, you can effectively dehumidify your attic, preventing moisture-related damage, promoting energy efficiency, and ensuring a healthy living environment.
How to Install an Attic Dehumidifier
Installing a dehumidifier for attic is a straightforward process that can significantly improve your home's air quality and energy efficiency. Follow these detailed steps to ensure a proper and effective installation:
1. Choose the Right Dehumidifier
Select a dehumidifier that is specifically designed for attic use. Ensure it can cover the size of your attic and features such as automatic shutoff, continuous drainage, and a humidistat to maintain desired humidity levels.
2. Prepare the Installation Area
Clear a space in your attic for the dehumidifier, ensuring adequate airflow around the unit. Remove any obstacles blocking the airflow or hindering the dehumidifier's functionality. Check that the chosen area is near a power source and has access to an external drain or a container that can be periodically emptied.
3. Install the Dehumidifier
Position the dehumidifier in the prepared area. Make sure it is level and stable. Follow the manufacturer's instructions for setup, which typically involve attaching hoses for drainage and configuring initial settings.
4. Set Up Proper Drainage
Proper drain is crucial to the ongoing operation of your dehumidifier. Connect the drain hose to either an external outlet, such as a floor drain or sump pump, or to a container that you can empty regularly. Ensure the hose is tightly secured and positioned to allow gravity to assist in draining water away from the unit.
5. Connect to a Power Source
Plug the dehumidifier into a suitable power outlet, preferably with surge protection to prevent electrical damage. Ensure the electrical cord is secure and does not pose a tripping hazard.
6. Adjust Settings
Set the desired humidity level on the dehumidifier, typically between 30-50%. Use the built-in humidistat to monitor and adjust settings as needed. Some models may require initial calibration, so refer to the user manual for specific instructions.
7. Test the System
Turn on the dehumidifier and let it run for a few hours. Ensure that it effectively removes moisture from the air and that the drainage system works correctly. Inspect the unit for any issues and address them immediately to maintain optimal performance.
8. Regular Maintenance
Perform regular maintenance on your dehumidifier to ensure it continues to operate efficiently. Clean the filter as the manufacturer recommends, check for any blockages in the drainage hose, and inspect the unit periodically to ensure it functions correctly.
Following these steps, you can finish attic dehumidifier installation, protecting your home from moisture-related damage and promoting a healthy living environment. Regular monitoring and maintenance will ensure the longevity and effectiveness of your dehumidification efforts.
Conclusion
Attic dehumidification protects your home and ensures a comfortable living environment. By understanding the sources of moisture, detecting problems early, and implementing effective dehumidification strategies, you can safeguard your attic from damage.


Leave a comment
All comments are moderated before being published.
This site is protected by hCaptcha and the hCaptcha Privacy Policy and Terms of Service apply.